Sending Emails from React with SMTP Express


Having a personal portfolio or corporate website makes presenting who you are and what your company stands for easier. Still, it also means that you must deal with communication with your website users. A contact section is necessary to gather inquiries and forward them to your email address from your website. Additionally, you could wish to deliver specific data to a user upon completing a particular action, such as forgetting a password, or maybe a guest wants to book a session with you. This article will show you how to do this very simply.

Discover how at OpenReplay.com.
Introduction
SMTP Express is a product that seamlessly aims to improve your emailing experience. It’s a developer-first product that allows you to send transactional email from any platform without needing a backend. Additional features include the ability to attach files and send calendar invites. Also, you can completely customize your email to match your vision. I assume you are eager to give it a try already, hehe!
Setting up SMTP Express
Let’s set up SMTP Express in your React app. Please go to the documentation to get started if you’d like to know how to install a brand-new React app.
We need to install axios. We’ll need it for sending a post request in the form to the base URL (Uniform Resource Locators), https://api.smtpexpress.com/send.
Copy this code to install Axios.
npm install axiosWe need to get two things from the product dashboard to configure the app to use this service.
- Project Id
- Project Secret
See How to Create a Project to get this data. The documentation also provides a detailed explanation of how to get your project secret. Your project ID will be given when you create a new project; you don’t have to worry about that.
Creating the React Form
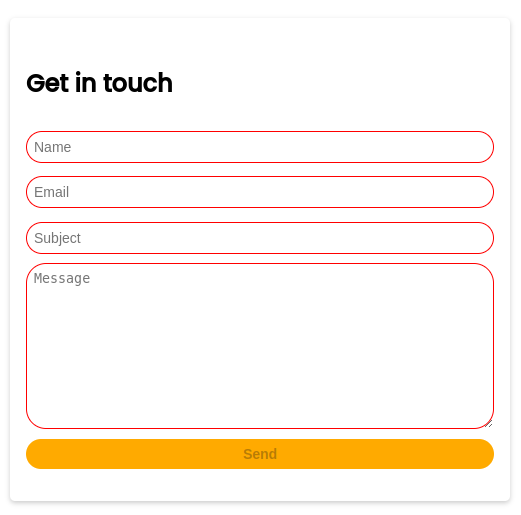
We need a form with four fields: the sender’s email address and name, the message’s subject, and the message’s body, in a standard email message format. The form then needs to be validated and styled.
Copy this code to create a form with validation logic.
import axios from "axios";

const ContactPage = () => {
  const [formData, setFormData] = useState({
    name: "",
    email: "",
    subject: "",
    message: "",
  });
  //use Axios to make a POST request;
  const api = axios.create({
    baseURL: "https://api.smtpexpress.com/",
    headers: {
      "Content-Type": "application/json",
      Authorization: "Bearer <PROJECT-SECRET>",
    },
  });

  const handleSubmit = async (e) => {
    e.preventDefault();
    try {
      const body = {
        subject: formData.subject,
        message: `<h1> ${formData.message} </h1>`,
        sender: {
          name: formData.name,
          email: "sm0pid-jqbeReRhLhpJDRhLjkFxMXGZt@projects.smtpexpress.com",
        },
        recipients: {
          name: "Oluwafemi Makanju",
          email: "makurseme@gmail.com",
        },
      };
      const response = await api.post("send", body);
      console.log(response.data);
    } catch (error) {
      console.error("Error sending email:", error);
    }
  };

  return <div>{/* This part contains the form component code  */}</div>;
};

export default ContactPage;
This code has several attributes and functions employed to create a controlled form component. The useState hook is utilized to manage the form’s state variables, enabling the component to track changes in input fields and update their values accordingly. The handleChange function handles input changes, ensuring that the formData state is updated with the new input values as users interact with the form. Meanwhile, the handleSubmit function is responsible for managing form submission, although it’s currently left empty in this example.
The isFormValid boolean variable evaluates whether all input fields have non-empty values, determining the form’s overall validity. The disabled attribute is applied to the submit button, preventing users from submitting the form if it contains empty fields. Finally, the required attribute ensures that input fields and textarea elements are mandatory. In contrast, the className attribute dynamically adds the “invalid” class to visually indicate to users which fields are required but empty. These attributes and functions facilitate form validation and enhance user interaction within the React component.
input {
 border: 0.78px solid #eee;
 padding: 7px;
 border-radius: 20px;
 margin-top: 4px;
 font-size: 14px;
}

.form {
 padding: 2rem 1rem;
}

.form h2 {
 padding: 1rem 0px;
}

textarea {
 padding: 7px;
 border: 0.78px solid #eee;
 border-radius: 20px;
}

.btn-contact {
 background: orange;
 padding: 7px;
 font-size: 14px;
 font-weight: bold;
 border-radius: 20px;
 cursor: pointer;
}

.invalid {
 border: 1px solid red;
}
This CSS code snippet defines styles for form elements to create a visually cohesive and user-friendly design. Input elements have a consistent appearance with borders, padding, and rounded corners, while headings and text areas are appropriately spaced for readability. The submit button stands out with bold text, an orange background, and rounded edges, encouraging user interaction. Additionally, an invalid class is defined to highlight empty input fields and text areas with a red border, providing visual cues for required input. Overall, these styles enhance the form’s usability and aesthetic appeal, contributing to a positive user experience.
Here is the overall implementation output.
Integrating SMTP Express
In this section, we will integrate the form with SMTP Express so that when a user clicks on the submit button, it sends the appropriate messages to the recipient address. Before we proceed, here are a few things to take note of from the previous section.
- We have created a function
handleSubmit; this function is where thesendApiis called when all validation has passed. - We have disabled the form button to be clickable only when all the required information has been passed.
- We have created a project, obtained the project secret and identified the project ID.
Next, let’s integrate the service by making an API (Application Programming Interface) call to the baseURL. Before doing this, there’s an important thing to know when passing your sender’s email in the request body.
Your sender email will be determined based on the option you opt for when creating a project.
sender: {
 name: 'Makanju',
 email: "senderemail@gmail.com",
}
This code example shows a sender object with two properties: name and email. This object is extracted from the request body.
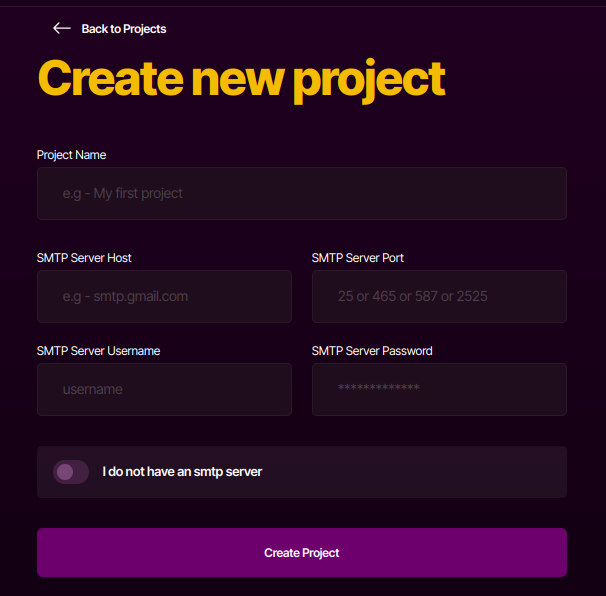 You can fill in your SMTP server configuration details if you have one or select the option “I do not have an SMTP server.” This second option gets you set up quickly. When you choose this second option, you are provided with an email, which you will pass as your sender email in the request body. However, you can also use any email if you provide your own custom server.
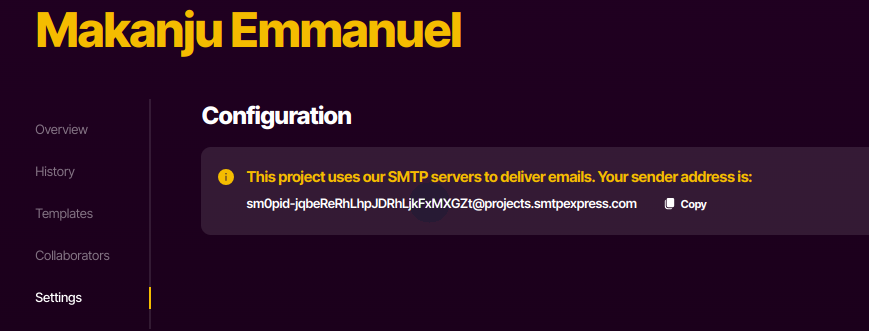 This image shows the email generated for me when I create a project with this option. You can access this data by going to your dashboard, clicking on the project, and selecting settings from the sidebar navigation. Now, let’s implement the send API.
To do this, copy this code and update your
This image shows the email generated for me when I create a project with this option. You can access this data by going to your dashboard, clicking on the project, and selecting settings from the sidebar navigation. Now, let’s implement the send API.
To do this, copy this code and update your ContactPage.jsx.
import axios from "axios";

const ContactPage = () => {
  const [formData, setFormData] = useState({
    name: "",
    email: "",
    subject: "",
    message: "",
  });
  //use Axios to make a POST request;
  const api = axios.create({
    baseURL: "https://api.smtpexpress.com/",
    headers: {
      "Content-Type": "application/json",
      Authorization: "Bearer <PROJECT-SECRET>",
    },
  });

  const handleSubmit = async (e) => {
    e.preventDefault();
    try {
      const body = {
        subject: formData.subject,
        message: `<h1> ${formData.message} </h1>`,
        sender: {
          name: formData.name,
          email: "sm0pid-jqbeReRhLhpJDRhLjkFxMXGZt@projects.smtpexpress.com",
        },
        recipients: {
          name: "Oluwafemi Makanju",
          email: "makurseme@gmail.com",
        },
      };
      const response = await api.post("send", body);
      console.log(response.data);
    } catch (error) {
      console.error("Error sending email:", error);
    }
  };

  return <div>{/* This part contains the form component code  */}</div>;
};

export default ContactPage;
In the ContactPage component, axios is utilized to facilitate communication between the frontend and backend servers through a POST request. Upon form submission, the handleSubmit function is invoked, which prevents the default form submission behavior using e.preventDefault(). Inside the handleSubmit function, a try-catch block is implemented to handle potential errors during the API request process. Within the try block, a body object is constructed containing the subject, message, sender, and recipient details obtained from the formData state. The axios.create() method is used to create an Axios instance with specified baseURL and headers, including the authorization token required for authentication. Subsequently, the api.post() method is invoked with the “send” endpoint and the body object as parameters to send the form data to the backend server. Upon successful completion of the request, the response data is logged to the console for debugging purposes.
Any errors encountered during the API request process are caught and handled within the catch block. If an error occurs, it is logged to the console using console.error(), providing insight into the cause of the issue. Error handling ensures that the application gracefully handles unexpected scenarios, such as network errors or server-side failures, by providing feedback to the user and allowing for appropriate correction. Additionally, error handling enhances the robustness and reliability of the application, ensuring smooth user experiences even in adverse conditions.
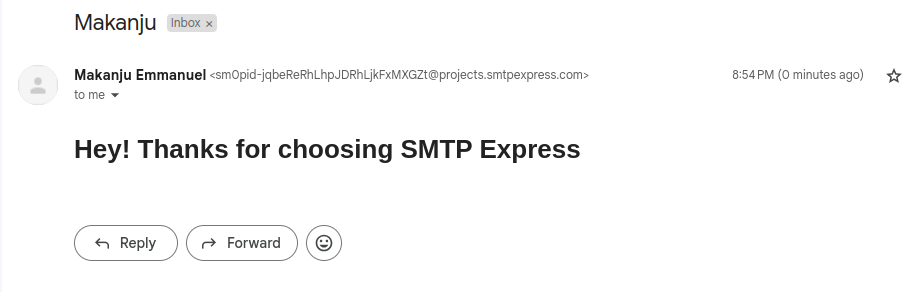 This is the result of my implementation; I got the mail directly in my inbox. Additionally, SMTP Express provides information on all email histories in your dashboard.
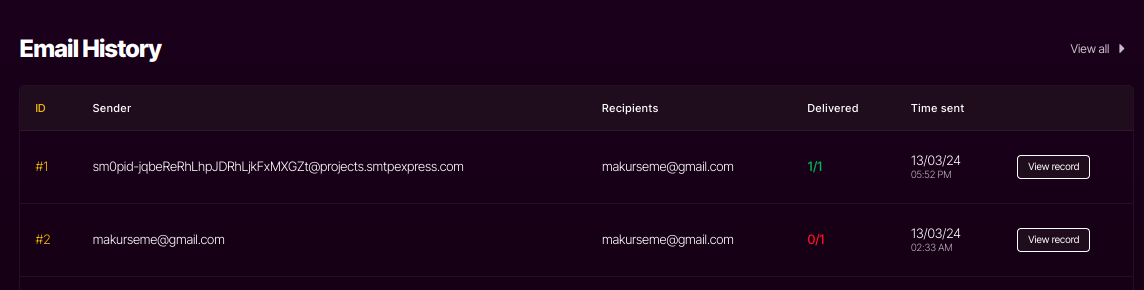 This is an example from my dashboard.
Advanced Features and Security
Apart from sending a direct email to a recipient address, SMTP Express also provides options to add an attachment, or even send a calendar invite to an address when they complete an action. With attachments, users can include files, such as documents, directly within their email messages, enhancing communication and collaboration. Additionally, SMTP Express enables the creation and sending of calendar invites, allowing users to schedule events, meetings, or appointments conveniently through email. These advanced features empower users to communicate more effectively and efficiently, streamlining workflows and enhancing productivity in both personal and professional contexts.
How to send a file attachment
To create an email that includes an attachment, add the attachments array to your request body in ContactPage.jsx.
import React, { useState } from "react";

const ContactPage = () => {
  const handleSubmit = async (e) => {
    e.preventDefault();
    try {
      const body = {
        attachments: ["link-to-actual-file"],
      };
      const response = await api.post("send", body);
      console.log(response.data);
    } catch (error) {
      console.error("Error sending email:", error);
    }
  };
};
export default ContactPage;
This code example shows how to pass an attachment in your request body. It’s quite simple, hehe! All you have to do is update the request body in ContactPage with the attachments array. Since it’s an array, you can add more file links if need be.
 This image shows an example output where I sent an attachment directly to my inbox.
How to send a calendar invite
To send a calendar invite, update the body of your request object with the calendarEvent object in ContactPage.jsx.
import React, { useState } from "react";

const ContactPage = () => {
  const handleSubmit = async (e) => {
    e.preventDefault();
    try {
      const body = {
        calendarEvent: {
          title: "Engineering Sync",
          startDate: "2024-01-18T23:00:00.000Z",
          endDate: "2024-01-19T23:00:00.000Z",
          organizer: "makanju@text.co",
          location: "Remote",
        },
      };
      const response = await api.post("send", body);
      console.log(response.data);
    } catch (error) {
      console.error("Error sending email:", error);
    }
  };
};

export default ContactPage;
This code example shows the calendarEvent object being passed in the request body; it contains properties such as title,startDate, endDate, organizer, and location. You can also add the description of the event as a property.
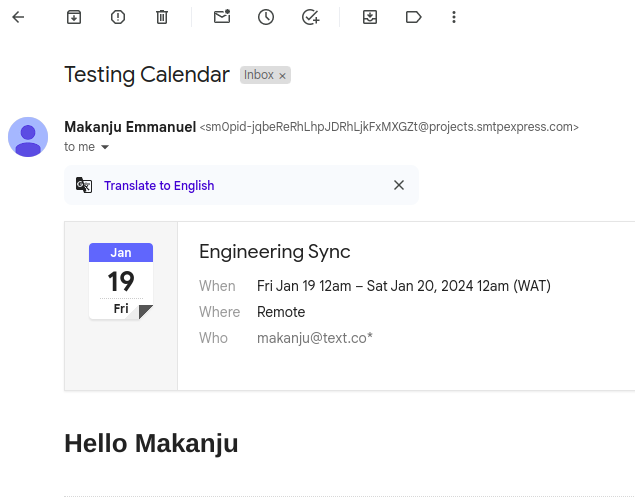 This image shows the calendar output sent directly to my email.
Security
In terms of security, if you provide custom SMTP server credentials instead of choosing the option that says “I do not have an SMTP server,” when creating a project, this data is encrypted before it is stored in the database, making sure that your data is safe and secure. Also, when creating a project secret, you will be asked to provide a domain name. This domain is used to provide security for your emails. If the mail is sent from a domain different from the one you provided, it will be rejected. You can also refresh your project secret if you think it has been exposed. This will nullify any security threat that could arise when your project secret is exposed.
Conclusion
In conclusion, for developers looking for dependable and feature-rich email communication solutions, SMTP Express is a valuable tool. With its advanced capabilities, which include calendar invites and attachments, it makes application integration easier and guarantees smooth communication. SMTP Express’s platform, which is both secure and efficient, enables the timely delivery of crucial communications, hence improving user engagement and collaboration.
Gain Debugging Superpowers
Unleash the power of session replay to reproduce bugs, track slowdowns and uncover frustrations in your app. Get complete visibility into your frontend with OpenReplay — the most advanced open-source session replay tool for developers. Check our GitHub repo and join the thousands of developers in our community.