Going serverless with Next.js


The term ‘serverless’ denotes a development model that lets a developer focus only on writing and deploying code without having to worry about where (the servers) they are deployed. The servers are often termed the ‘cloud’, and they free you from much work. This article will show you how to work in serverless fashion with the popular Next.js framework.
Sorry to disappoint you, but ‘serverless’ does not mean no servers are involved. Serverless functions are code functions written by developers to handle a certain task. These functions are deployed on a third-party service that tends to handle server maintenance and scaling while the developer only has to write and ship their code. In the conventional methods, the server infrastructure, including memory usage and operating system type, is configured by the developer but for serverless functions, the developer is isolated from all the processes.
Serverless functions have several advantages:
- Scalability: Using them, a huge increase in traffic or users will not lead to downtime or reduce in speed, unlike conventional methods where the developer will need to configure a whole new server to handle the situation.
- Reduced Cost: They run on demand. This means you only get to pay when they are used. This is very cost-effective compared to the conventional methods where you will pay on both active and off times.
- Quick Deployment and Updates: Since there’s no work on the developer to perform backend and server configurations, they often can update, patch, fix or add new features quickly.
- Improved Security: They are often executed in secure environments and are isolated from one another, which can help lower the chance of security flaws.
Intro to serverless functions in Next js and some common use cases
Next.js, a framework for building server-rendered or static export React applications, implements serverless functions out of the box. This is one of the few reasons it has gotten popular since its creation. It is often referred to as a full-stack framework, as you could write client code and backend functions in one application.
Some common use cases of serverless functions in Next.js include:
- User authentication: when the login form is submitted, a user’s credentials are sent to a serverless function which executes and returns a token if the user is verified and stores it in the browser.
- Background tasks: Examples include processing data or sending emails. Because these responsibilities are offloaded and separated from the core platform, this can be advantageous for the overall efficiency of your application.
- Fetching Data: They are also often used to get data from a backend API or a database which are then rendered to the page.
Best Practices for Organizing and managing serverless functions
To be able to harness all the positives of using serverless functions, you have to do your part in structuring and organizing them. These are some helpful tips for doing so.
- One serverless function per route: This helps test and limit errors.
- Simple and Concise: Make your serverless functions as simple as possible, performing only one purpose rather than behaving like monolithic applications.
- Keep related functions together: Grouping related functions into the same file or directory can be useful. For instance, a directory called “auth” might include all your authentication-related operations.
- Document your functions: As your applications scale up, the number of serverless functions you need increases, so you should consider documenting your function using comments or in separate README files. This helps improve the maintainability of your application.
- Descriptive Names: As the general principle of using functions, give all serverless functions descriptive names; for instance, a getUser already gives a good idea of what the code block should do.
Session Replay for Developers
Uncover frustrations, understand bugs and fix slowdowns like never before with OpenReplay — an open-source session replay tool for developers. Self-host it in minutes, and have complete control over your customer data. Check our GitHub repo and join the thousands of developers in our community.
How to create and deploy serverless functions in a Next.js project
Until now, we have been talking about serverless functions and their use cases. Let’s create an actual serverless function:
First, Open the terminal of your Code Editor and run the commands below:
npx create-next-app@latest next-serverless --js --no-eslint --use-npm
//When prompted press Y and then ENTER
cd next-serverless
After successful completion, you should have a basic Next.js boilerplate with some folders and files. We’re going to do a simple server-side pre-render.
Creating A Basic Server Rendering Using getStaticProps function
- Navigate to
pages/index.jsand replace the code with the one below.
import Head from "next/head";
import styles from "../styles/Home.module.css";
export async function getStaticProps() {
  const response = await fetch("https://jsonplaceholder.typicode.com/users");
  const result = await response.json();
  const data = await result[0];
  return {
    props: {
      data,
    },
  };
}
export default function Home({ data }) {
  return (
    <>
      <Head>
        <title>Next Serverless Example</title>
        <meta name="description" content="Generated by create next app" />
        <meta name="viewport" content="width=device-width, initial-scale=1" />
        <link rel="icon" href="/favicon.ico" />
      </Head>
      <main className={styles.main}>
        <div className={styles.center}>
          <h1>HELLO {data.name}</h1>
        </div>
      </main>
    </>
  );
}- Next, we create the getStaticProps function.
getStaticPropsandgetServerSidePropsare two functions used to do server-side rendering in Next.js, and they will both work in this case.- The difference between both is
getStaticPropsis only called once at a built time and used to populate the specific page (pre-render or Static Site Generation SSG), whilegetServerSidePropsis called for every request to the server. Both functions will work in our case, but the former is more performant.
In the function, we fetch mock data from the JSONplaceholder website. This returns a list of objects, with each object having a name, an id, and other properties.

For this tutorial, we only need one of the objects, which we return as a data property in our props.
- Next, we create our
Homecomponent and de-structure thedataproperty from thepropspassed into it, and then we render thenameproperty of the object onto the page. - After that run:
npm run devin your terminal and open the link where the webpage is served (usuallylocalhost:3000)
You should see a simple page similar to the one below.
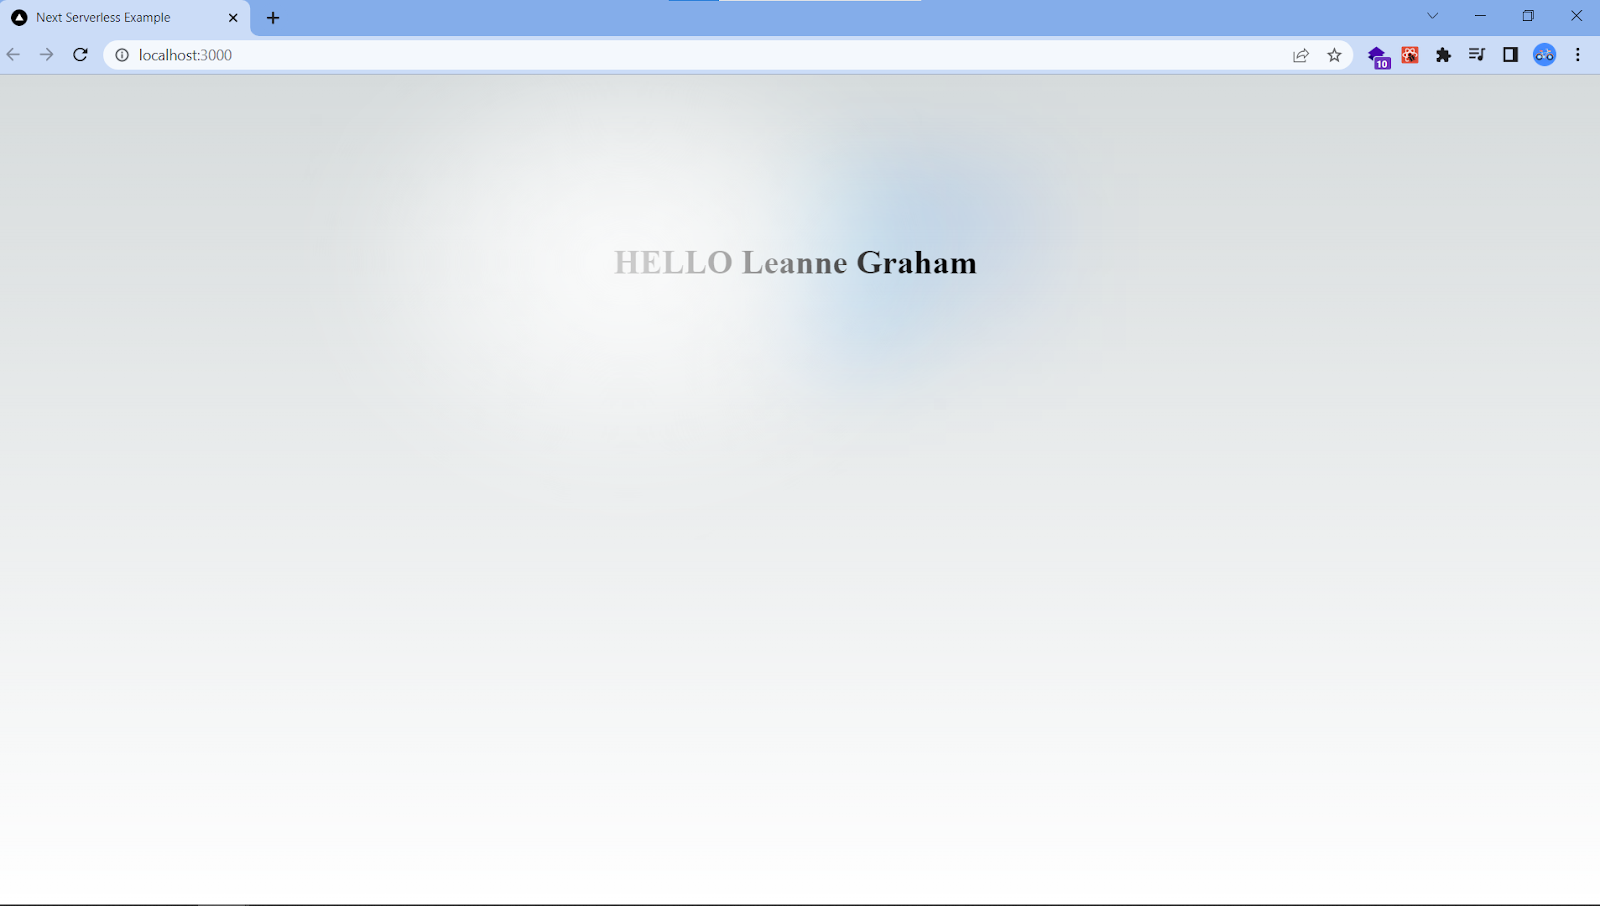
This is a simple example of using serverless functions in Nextjs to render components from the server. The main difference between this and fetching data (using useEffect hooks) from native React is the data fetching here occurs on the server, and the content is built into the component before rendering, which helps Search Engine Optimization (SEO) and performance.
Creating And Deploying Your Serverless Function
Now, we will do a more complex example based on what we have done above. Pre-requisites:
- GitHub is installed on your machine.
- A GitHub account.
- Knowledge of creating and pushing local git repositories to GitHub.
- A Vercel account to deploy your functions.
Still in the next-serverless folder,
Navigate to pages/api and open the hello.js file.
This is what we will fetch for in the getStaticProps function. It serves as our serverless function.
Replace John Doe with your name.
The api/hello is called a route and could be accessed by going to <your-site-name>/api/hello.
There are platforms we could deploy our serverless function, including Vercel, AWS (called Lamda Functions), Netlify (called Netlify functions), etc. For simplicity, we will use Vercel because of the native support for Nextjs and hence fewer configurations than the others.
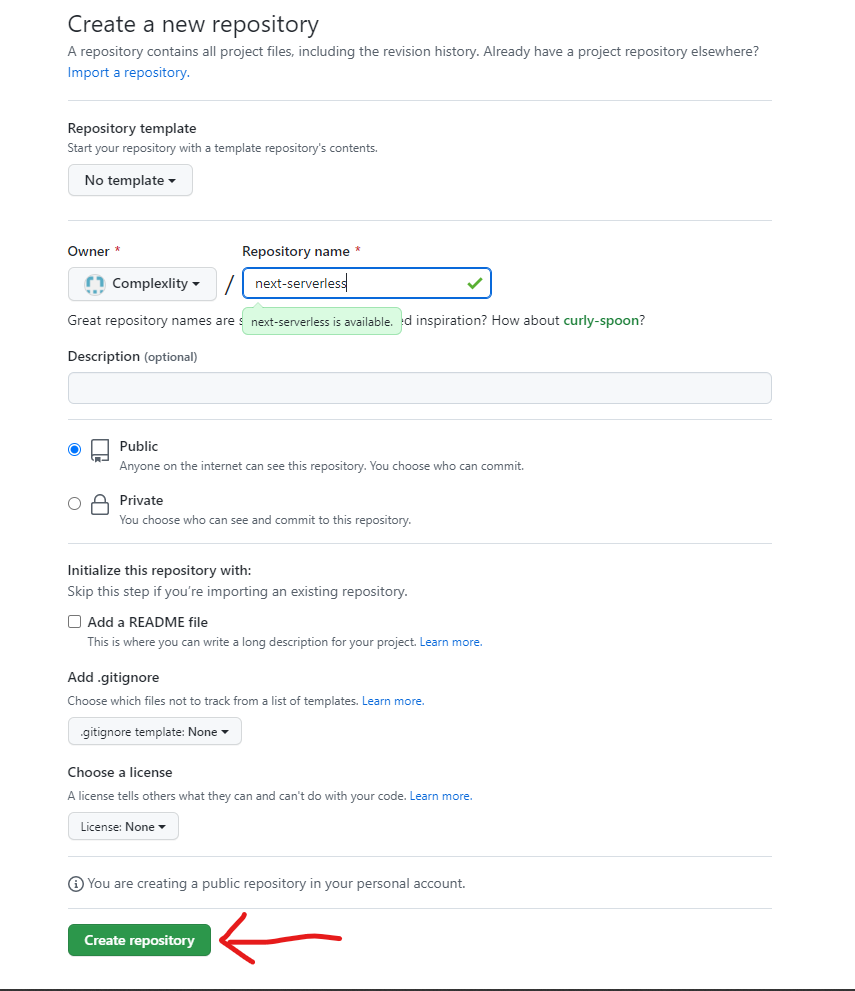
- First, create a new repository and name it
next-serverlesson your GitHub account. Refer below for the step-by-step guide.
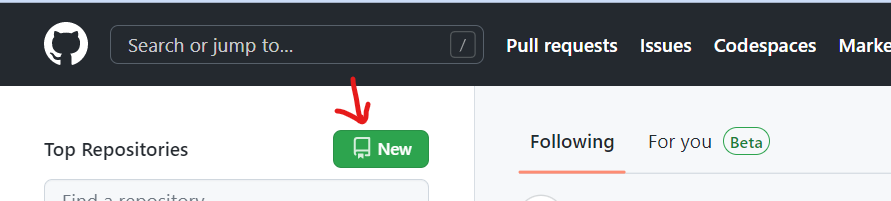 |
|---|
| Left: GitHub landing page once signed in Right: After clicking the new button |
- Next, enter the following commands in your local terminal to push your code to GitHub
Note The commands below only work if you have git installed. If not, download and install git to follow along.
git init
git add .
git commit -m "Create and deploy serverless function"
git remote add origin https://github.com/<your-github-username>/next-serverless.git
git branch -M main
git push -u origin main
Reload the GitHub page to see the changes.
- Next, We have to deploy our application on Vercel using the GitHub repository created above. Refer to the images below.
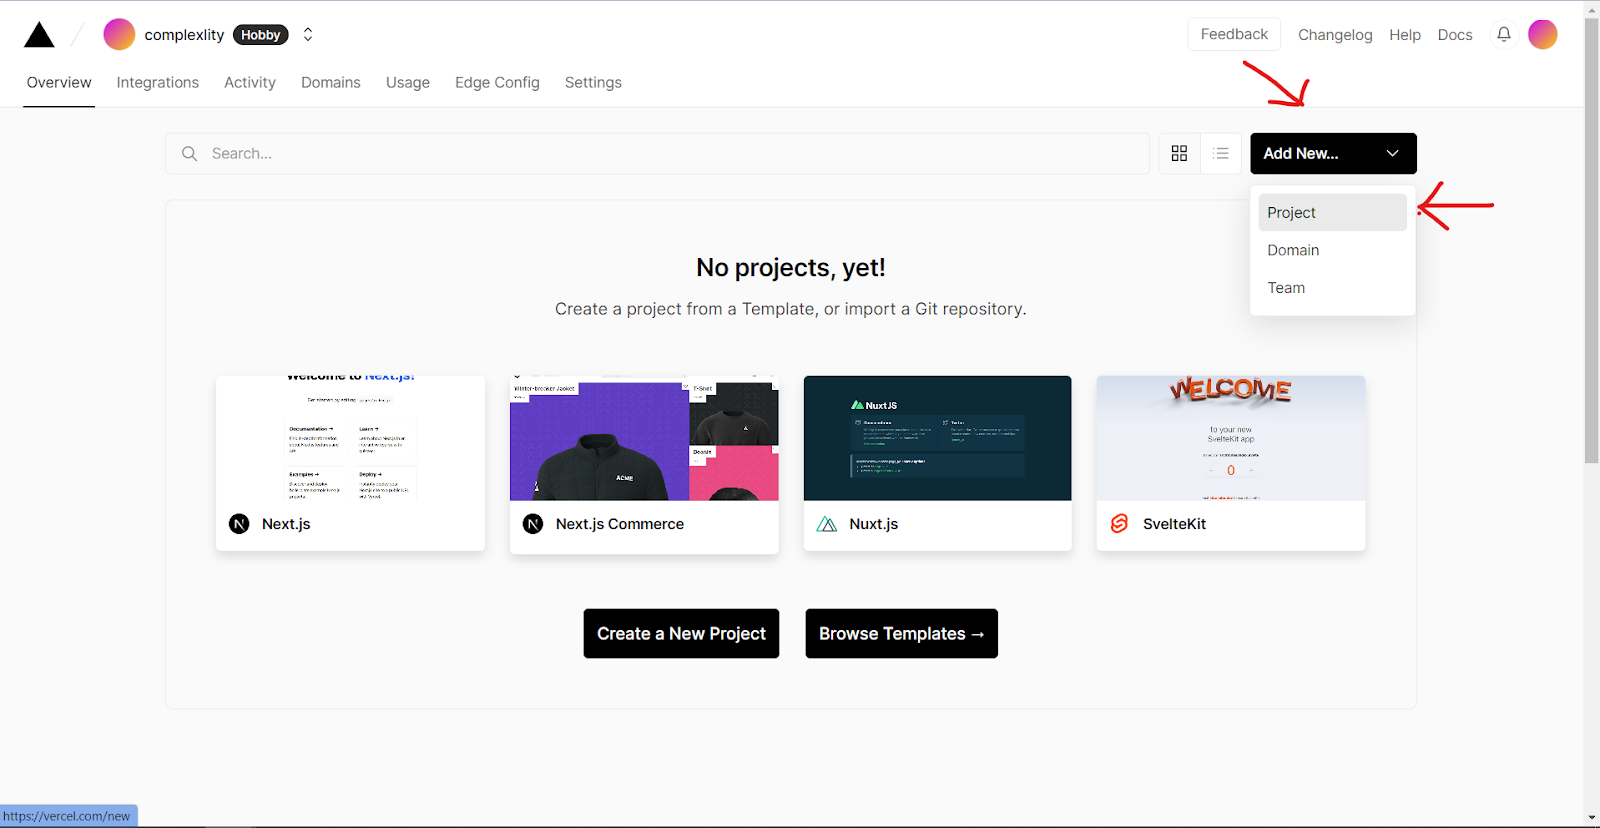

Note: You must connect your GitHub account before importing your Git repository. Click the dropdown below Import Git Repository to do so.
- After successful import, Click deploy without doing any configuration. You should see an image similar to the one below.


On completion, open your application link to ensure that it still works as it should (next-serverless-phi.vercel.app). In my case, yours will be different. Also, in the browser, go to the address: <your-project-link>/api/hello (In my case, It will be next-serverless-phi.vercel.app/api/hello). You will see a similar page to the one below.
 |
|---|
| Where John Doe would be your name entered in the hello.js file |
- If all is successful, you’re ready for the final step. Head back to your code editor. In the
next-serverlessfolder, open the index.js file and replace the code with the one below.
import Head from "next/head";
import styles from "../styles/Home.module.css";
export async function getStaticProps() {
  const res = await fetch("<your-project-link>/api/hello");
  const data = await res.json();
  return {
    props: {
      data,
    },
  };
}
export default function Home({ data }) {
  console.log(data);
  return (
    <>
      <Head>
        <title>Next Serverless Example</title>
        <meta name="description" content="Generated by create next app" />
        <meta name="viewport" content="width=device-width, initial-scale=1" />
        <link rel="icon" href="/favicon.ico" />
      </Head>
      <main className={styles.main}>
        <div className={styles.center}>
          <h1>HELLO {data.name}</h1>
        </div>
      </main>
    </>
  );
}
The notable difference we made is on line 5. We no longer fetch the date from an external API but from our created serverless function.
Ensure to replace <your-project-link> with one gotten after deploying the application. In my case, next-serverless-phi.vercel.app.
- After that, run
npm run dev.
Open the localhost link. You should see a page saying Hello <your-name>. To deploy the function, enter the following commands in your editor terminal.
git add .
git commit -m "Create a serverless function in new route"
git push
Congratulations!!, you have created and deployed your serverless function.
Re-open <your-project-link> to see the updated page.
Conclusion
Serverless functions is an innovative technology that will help you create more stable products while scaling as much as needed. They are supported natively by Next.js, so you should always consider using them in your sites and applications.
Gain Debugging Superpowers
Unleash the power of session replay to reproduce bugs and track user frustrations. Get complete visibility into your frontend with OpenReplay, the most advanced open-source session replay tool for developers.